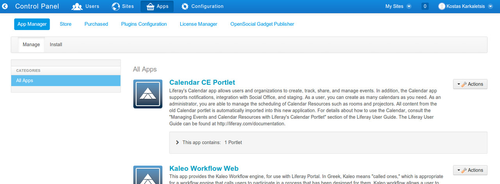
First you have to download (Releases) and install openncp-stork-plugin and deploy it to the OpenNCP portal. You can do this from the App Manager of OpenNCP portal that can be found in the control panel.
Then and after this plugin has successfully installed in your installation you can proceed with the stork configuration page that can be found under Control Panel - Portal Settings - Authentication
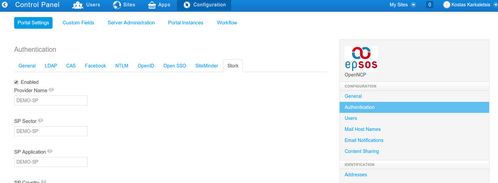
There you can define/override the default settings of stork plugin. The properties can be configured are the following:
Stork Configuration Properties
### With this property you can switch on and off the stork plugin
stork.enabled=true
provider.name=DEMO-SP
sp.sector=DEMO-SP
sp.aplication=DEMO-SP
sp.country=LOCAL
sp.qaalevel=3
### PEPS URL, this has to be changed and configured to your PEPS installation
peps.url=http://openncp6.gnomon.com.gr:9680/PEPS/ServiceProvider
### The stork login url must be relevant to your openncp installation domain.
stork.login.url=http://<openncpportal.url>/stork-plugin-0.5.0-SNAPSHOT/storkServlet
sp.return=http://<openncpportal.url>/
# Here is the list of the attributes used and requested to be returned from the stork application
sp.mandatory.personal.attributes=eIdentifier,givenName,surname,eMail
sp.mandatory.business.attributes=isHealthCareProfessional,Title
sp.mandatory.legal.attributes=
# DO NOT CHANGE THIS
# portal settings stork tab
company.settings.form.authentication=general,ldap,cas,stork
terms.of.use.required=false
users.email.address.required=false
login.form.navigation.pre=stork
auto.login.hooks=com.liferay.portal.security.auth.StorkAutoLogin
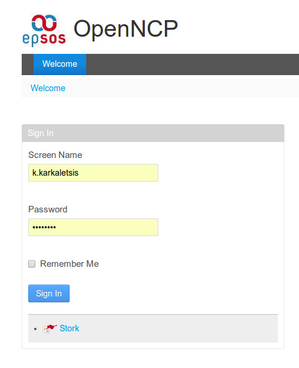
After enabling the stork authentication you should see in your first page of portal the following screen with stork link enabled
From now on and the latest version of openncp portal has to be deployed under Liferay portal 6.2 CE GA1. In order to upgrade your installation you have to follow the instructions below:
- Download this liferay version from here
- Populate the database using the scripts that can be found here
- Adjust portal-ext.properties file with the following options
# # MySQL (You can confiure any other database by providing the appropriate settings)
jdbc.default.driverClassName=com.mysql.jdbc.Driver
jdbc.default.url=jdbc:mysql://localhost/lp62?useUnicode=true&characterEncoding=UTF-8&useFastDateParsing=false
jdbc.default.username=<username>
jdbc.default.password=<password>
# EPSOS ROLES (These roles will be created by default on openncp portal startup
system.roles=Doctor,Pharmacist,Patient,Nurse
system.role.Doctor.description=Doctor Role
system.role.Pharmacist.description=Pharmacist Role
system.role.Patient.description=Patient Role
system.role.Nurse.description=Nurse role
Then download the latest artifacts from joinup and install them in openncp portal using one of the following ways:
- Copy the war files in the "deployment" folder placed under openncp portal directory
- Using AppManager of OpenNCP Portal that can be found at http://<your-ip-address./group/control_panel?refererPlid=10602&p_p_id=3_WAR_marketplaceportlet
Configure HCER.PROPERTIES
If you want to use the functionality of using hcer database (used by trillium) you have to create a file named hcer.properties under EPSOS_PROPS_PATH with the following content
jdbc.default.driverClassName=com.mysql.jdbc.Driver
jdbc.default.url=jdbc:mysql://localhost:3306/hcer?useUnicode=true&characterEncoding=UTF-8&useFastDateParsing=false
jdbc.default.username=<username>
jdbc.default.password=<password>